Publish to Sanity
Connect your Sanity project so every article becomes a document in your dataset, mapped to your own schema. No code needed.
Last updated on
Connect your Sanity project once and GrowWriter creates a document for every article you publish, shaped to match your schema. You need about ten minutes and a token for the project.
What you need
- Your Sanity project ID and the dataset your site reads from,
usually
production. Both are on the project's page at manage.sanity.io. - An API token with Editor permissions, created under API, then Tokens, on the same page.
- A document type for posts in your schema, with at least one existing document. GrowWriter reads a sample to learn the fields.
If someone else set up Sanity for your site, send them this section and ask for the three values. The token is the only one that is secret.
Create the token
- Open your project at manage.sanity.io.
- Go to API, then Tokens, and add a token named GrowWriter.
- Choose Editor permissions. Read-only tokens cannot publish.
- Copy the token. Sanity shows it once.
Connect in GrowWriter
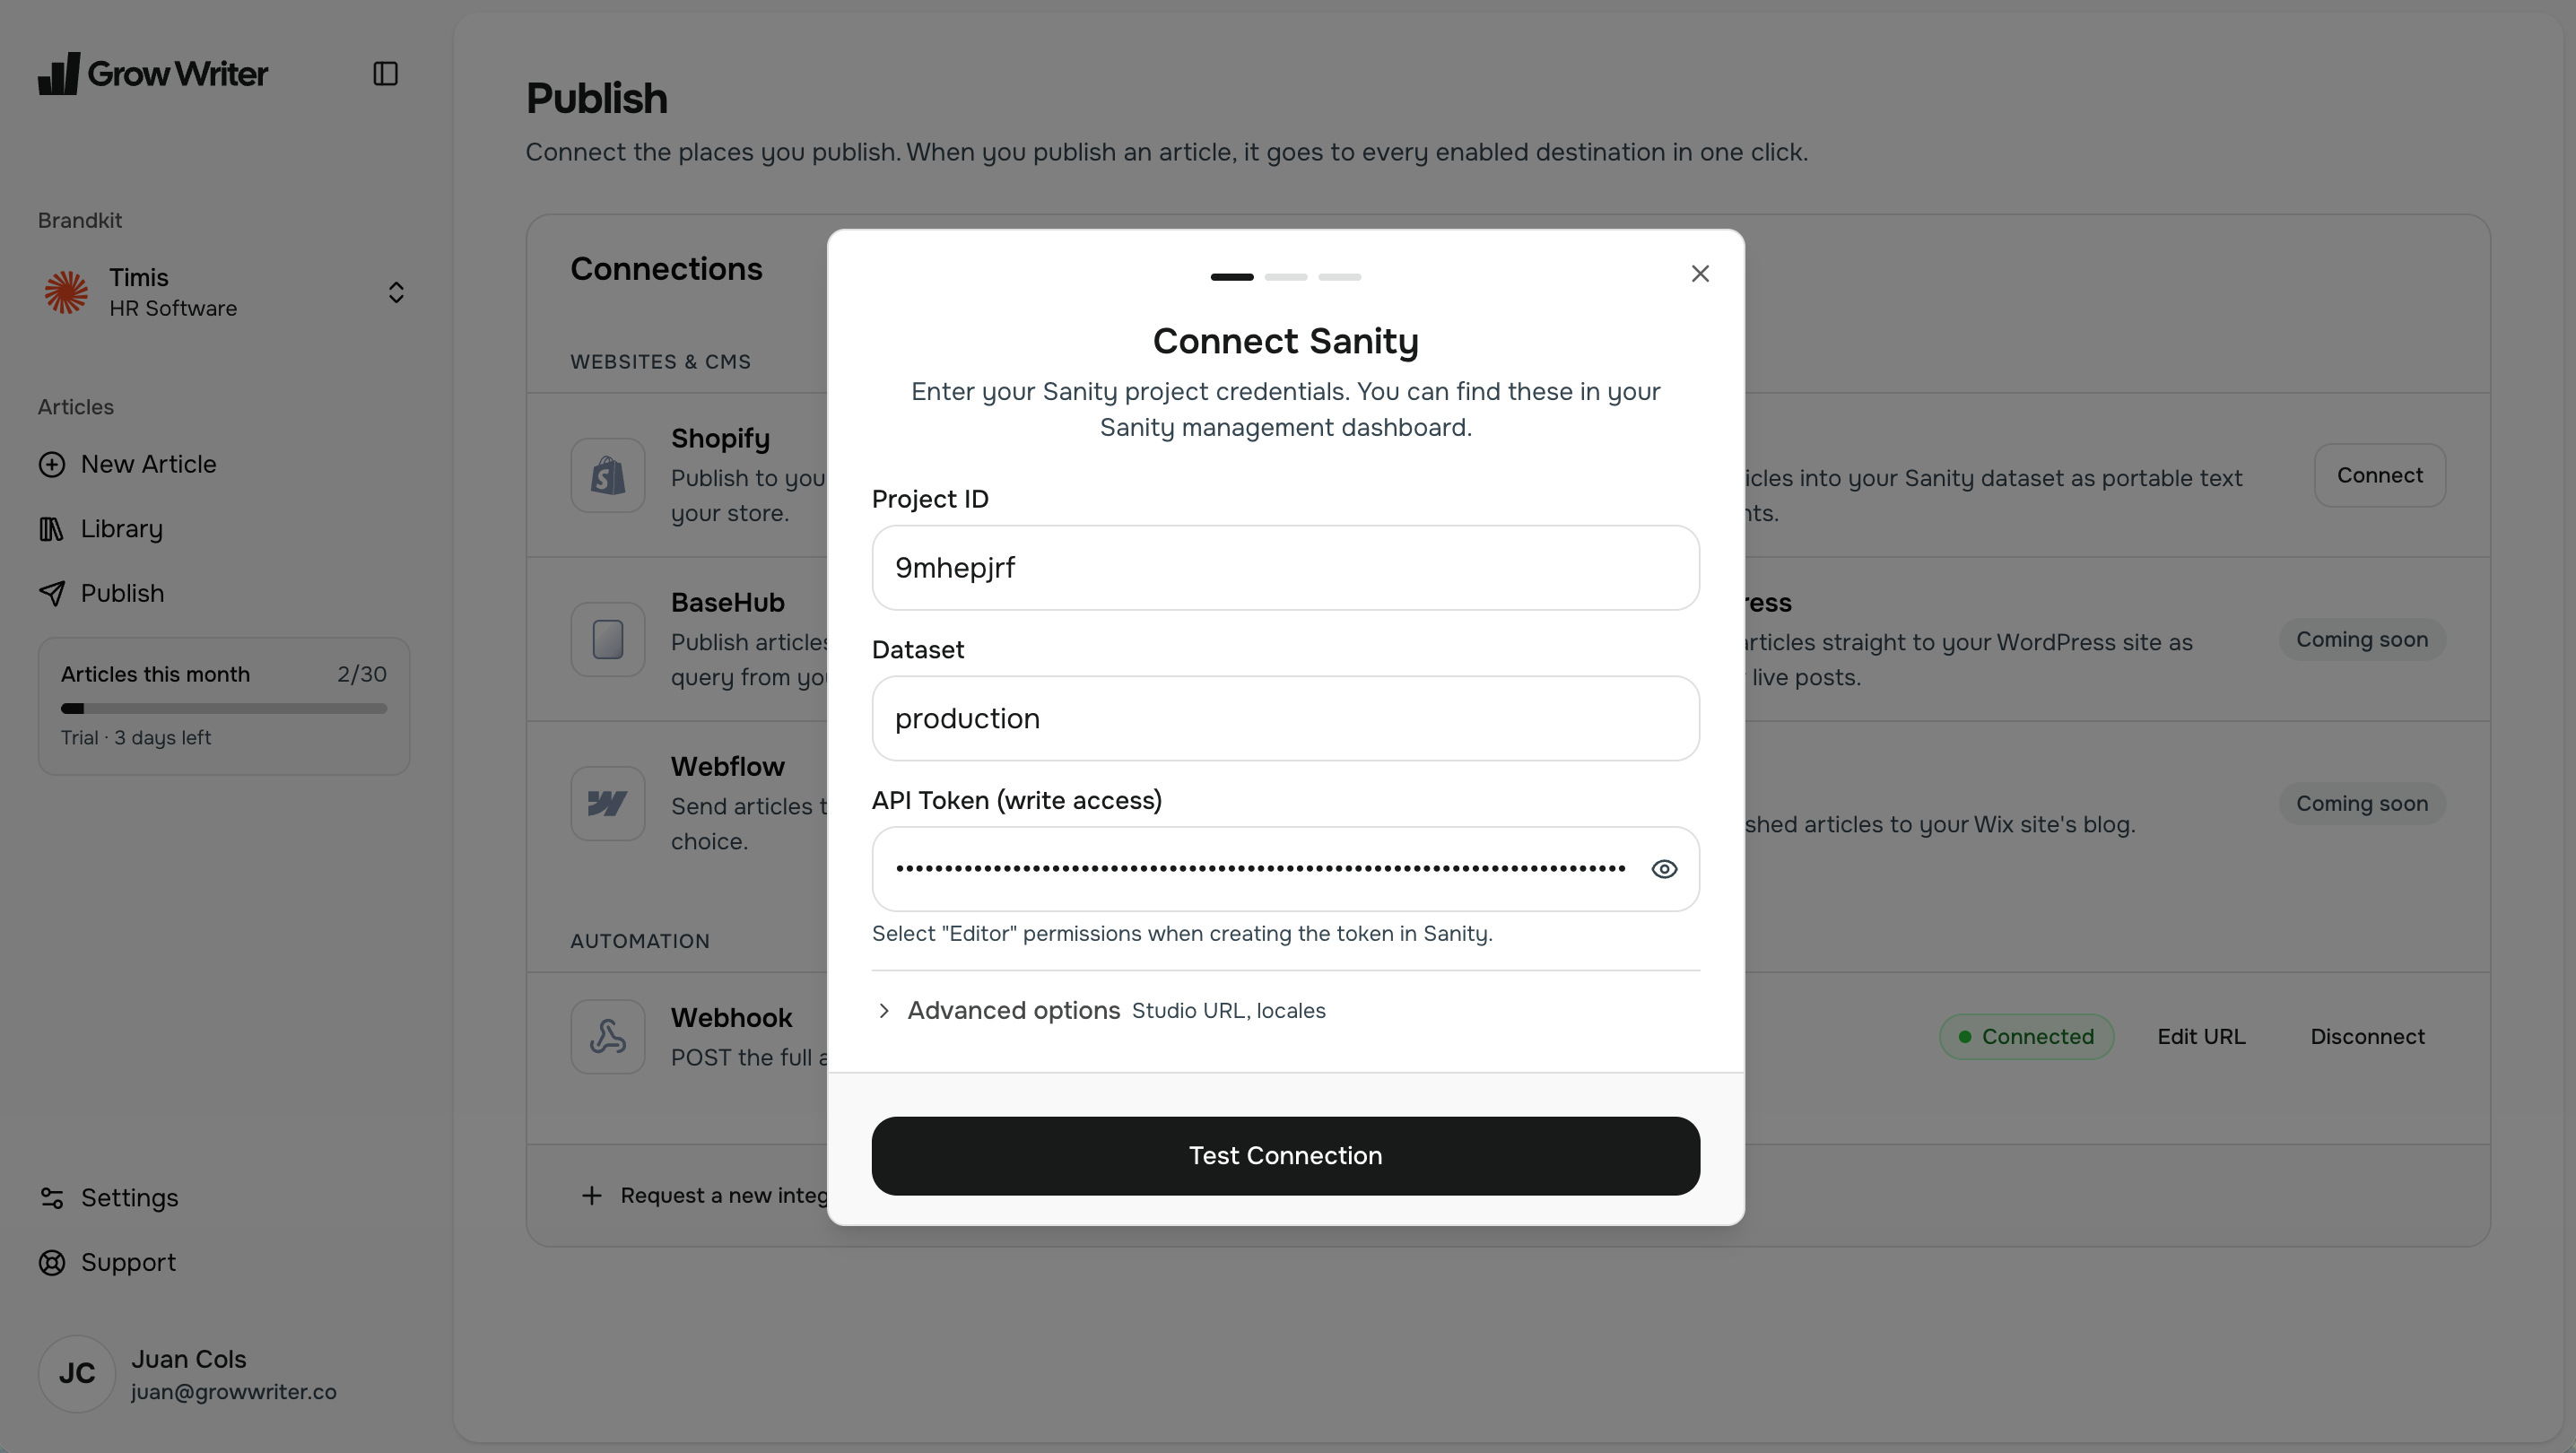
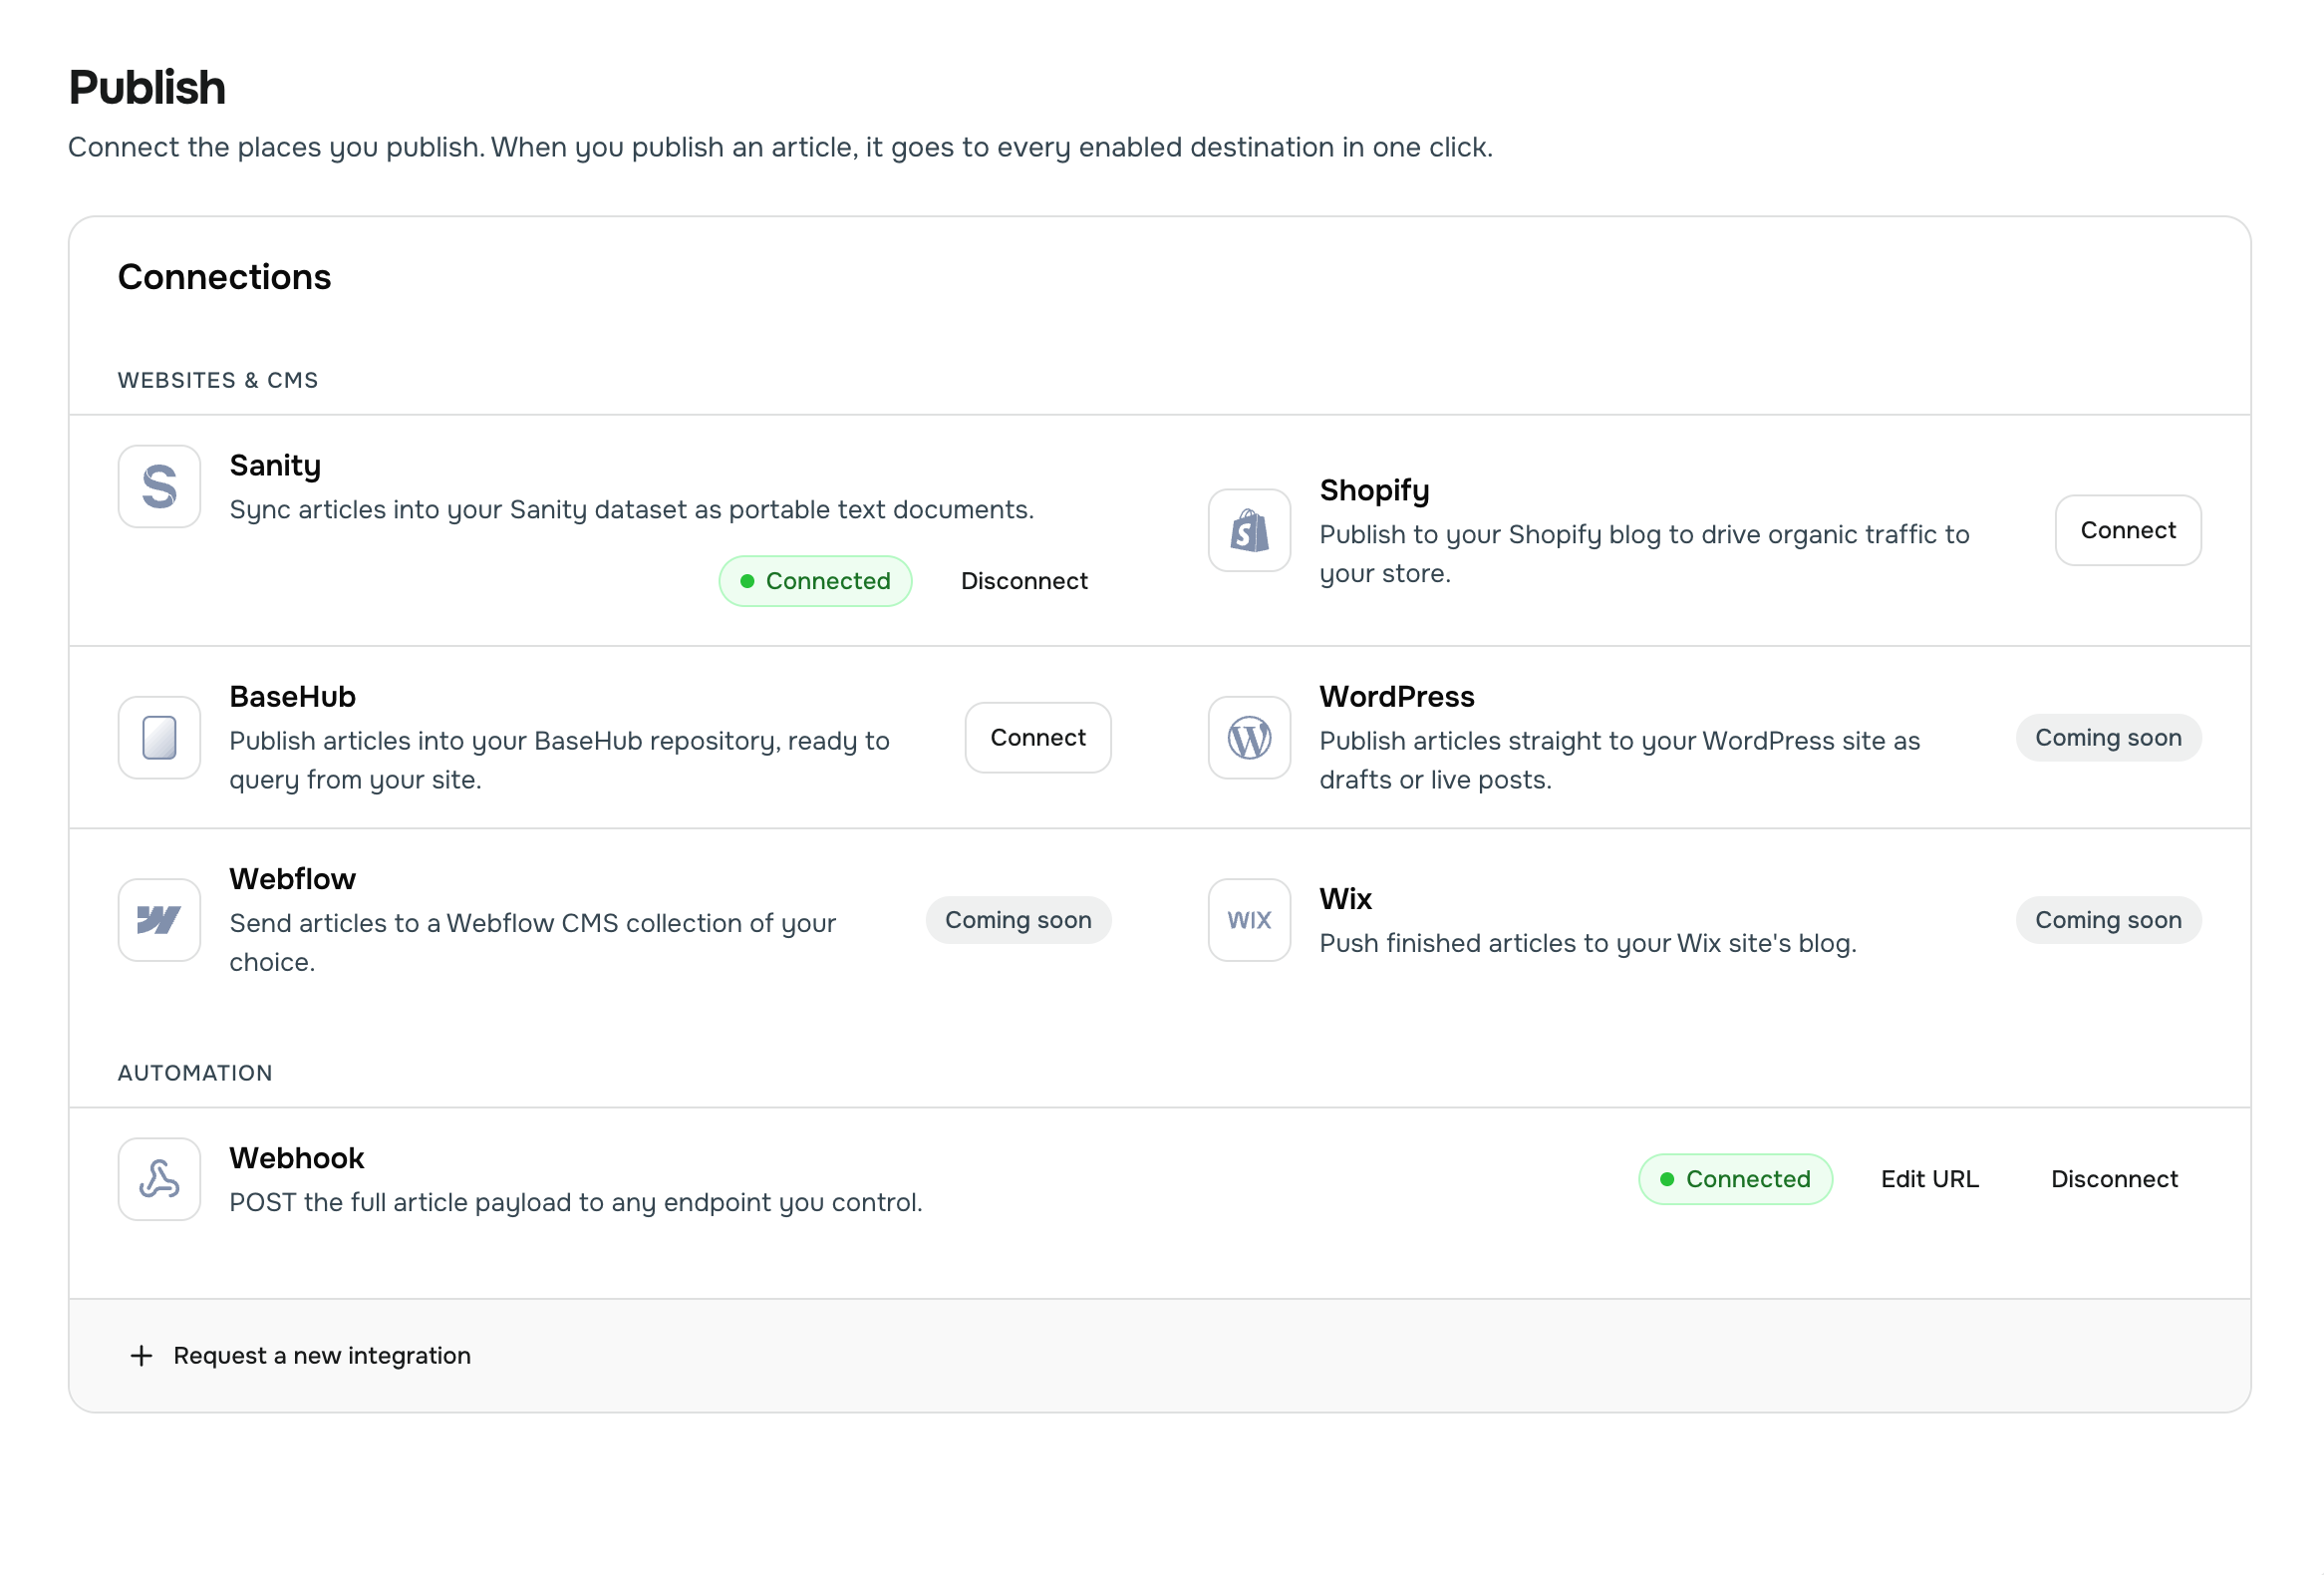
Open the Channels page, find Sanity under Websites & CMS and click Connect.
- Project ID and Dataset: from the project page.
- API Token (write access): the token you just created.
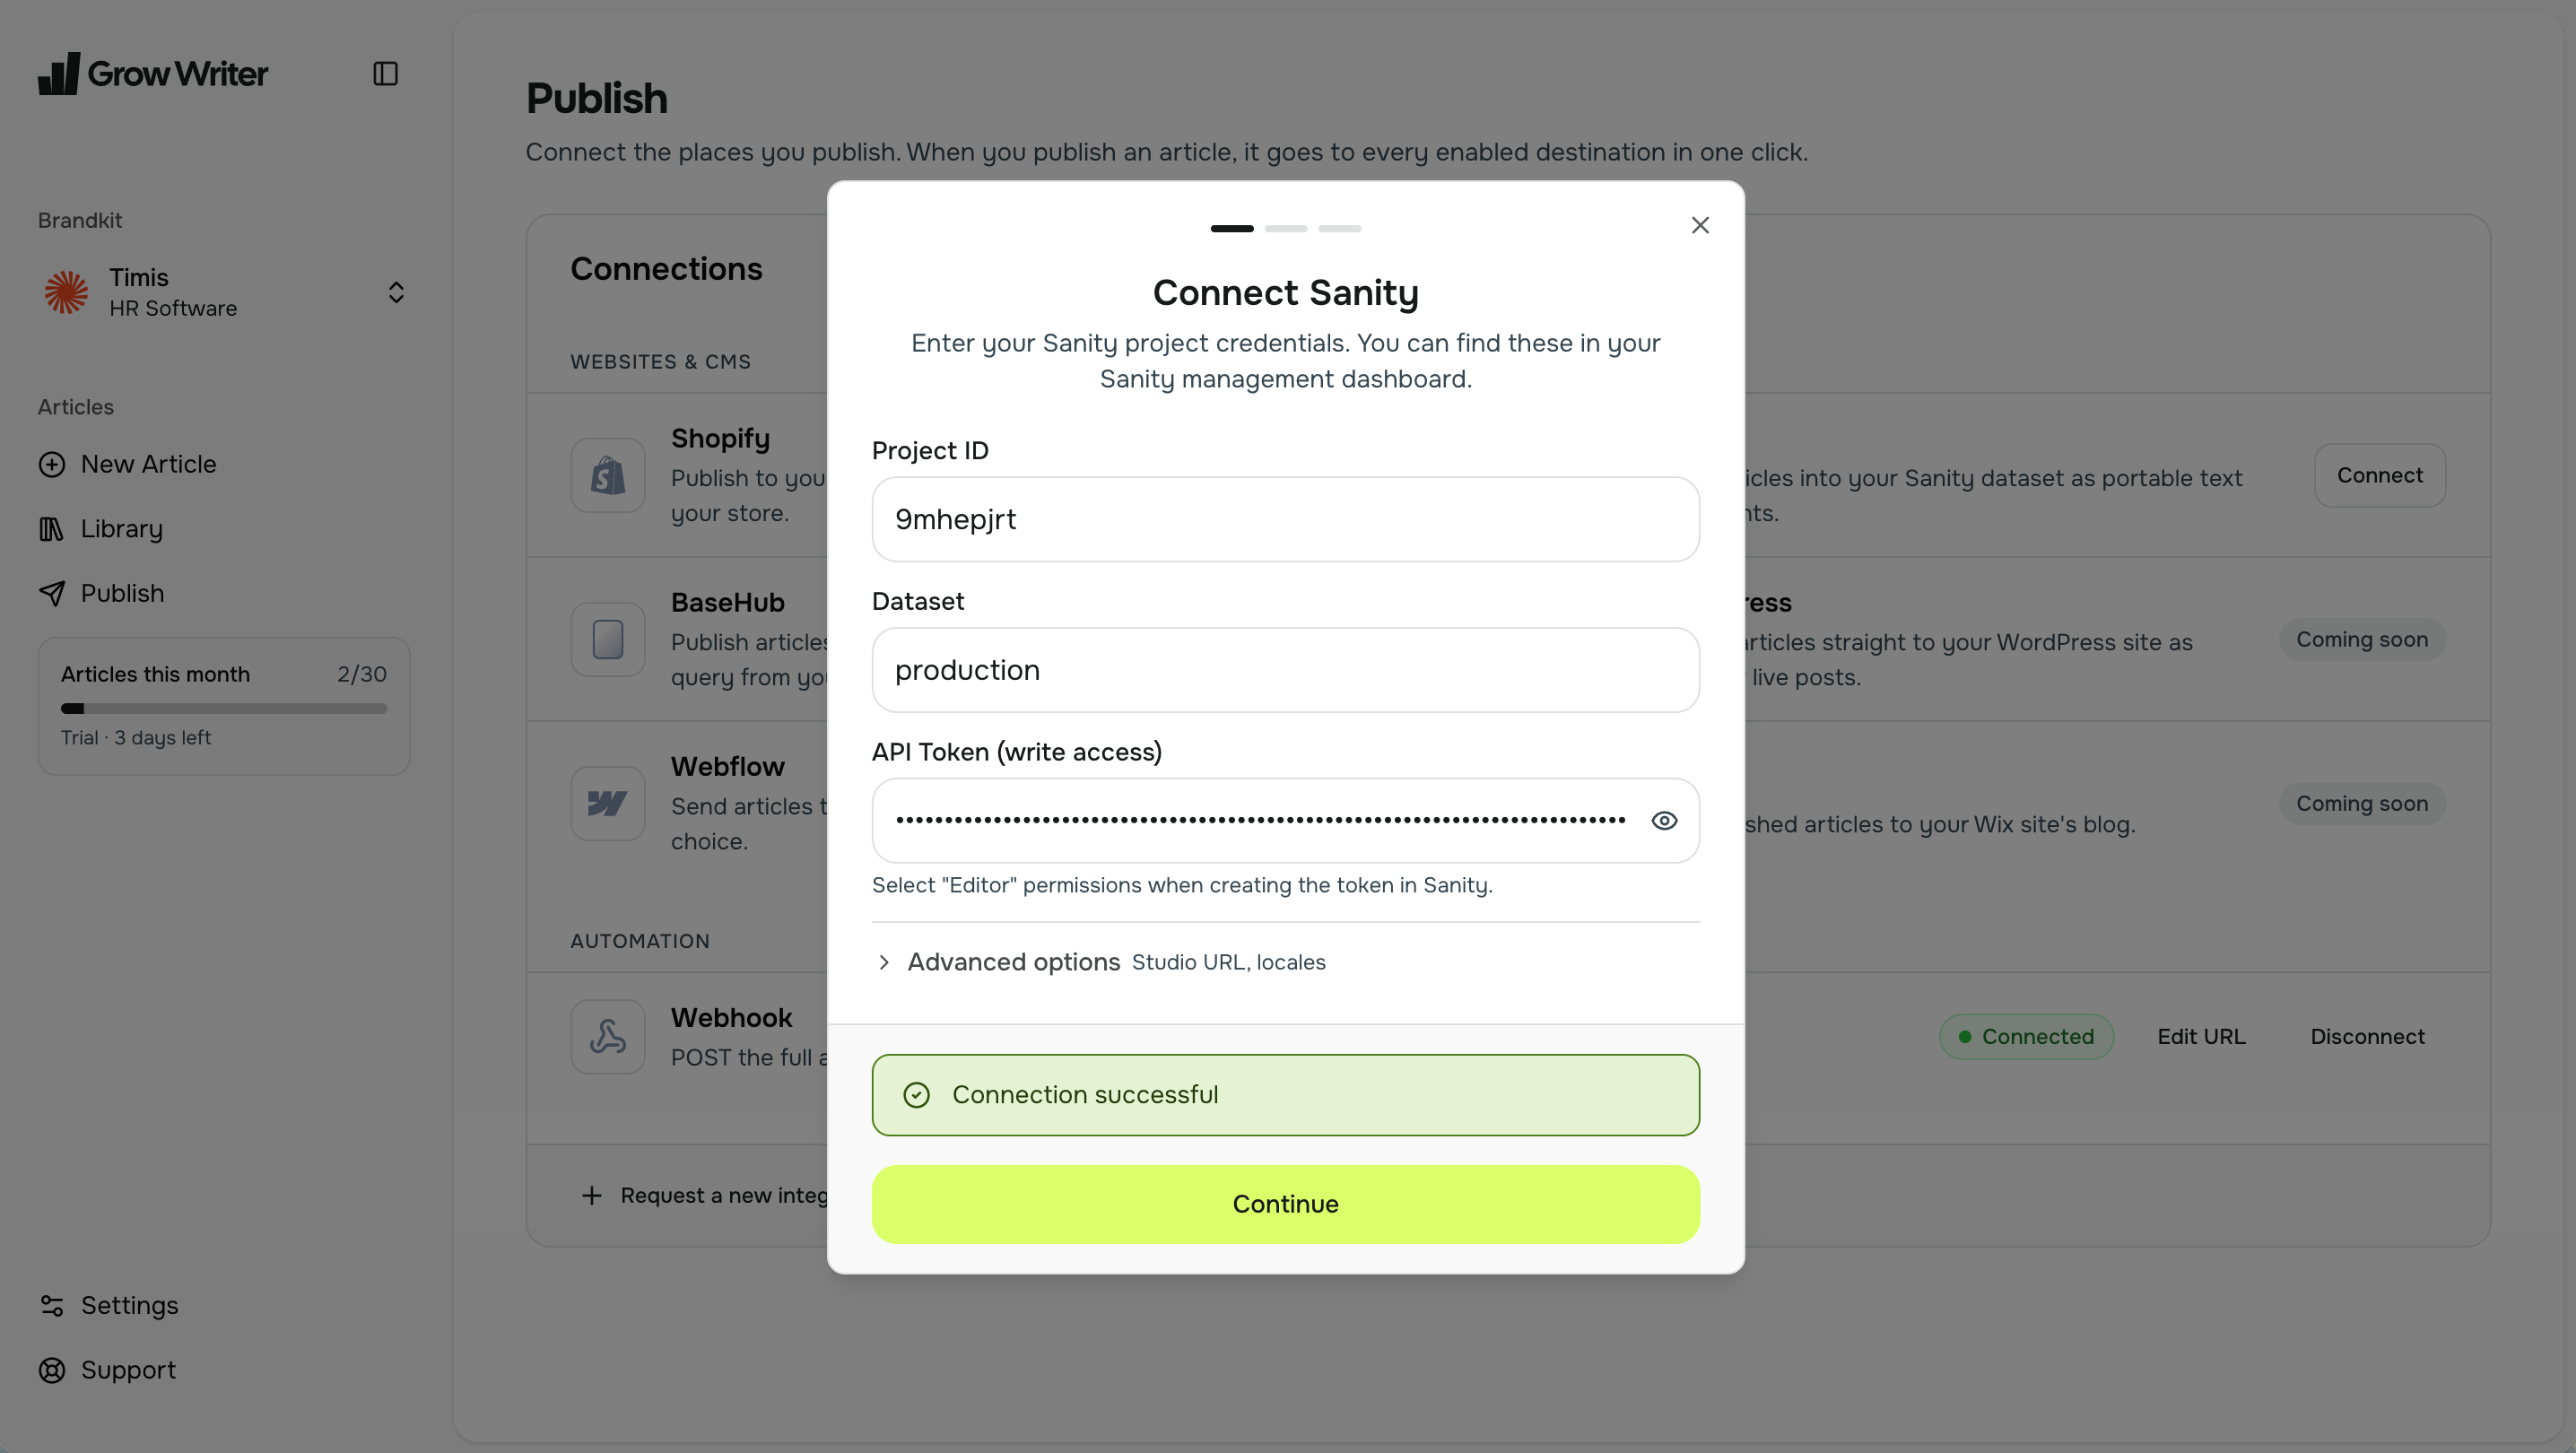
- Click Test Connection. Connection successful means GrowWriter can read and write the dataset.
Two optional settings sit under Advanced options:
- Studio URL: your Studio address, like
https://myproject.sanity.studio. With it, the View post link after publishing opens the document in your Studio. - Locales: the language codes your schema uses, comma-separated, like
en, es. Leaveenif your schema has no languages.
Pick the document type
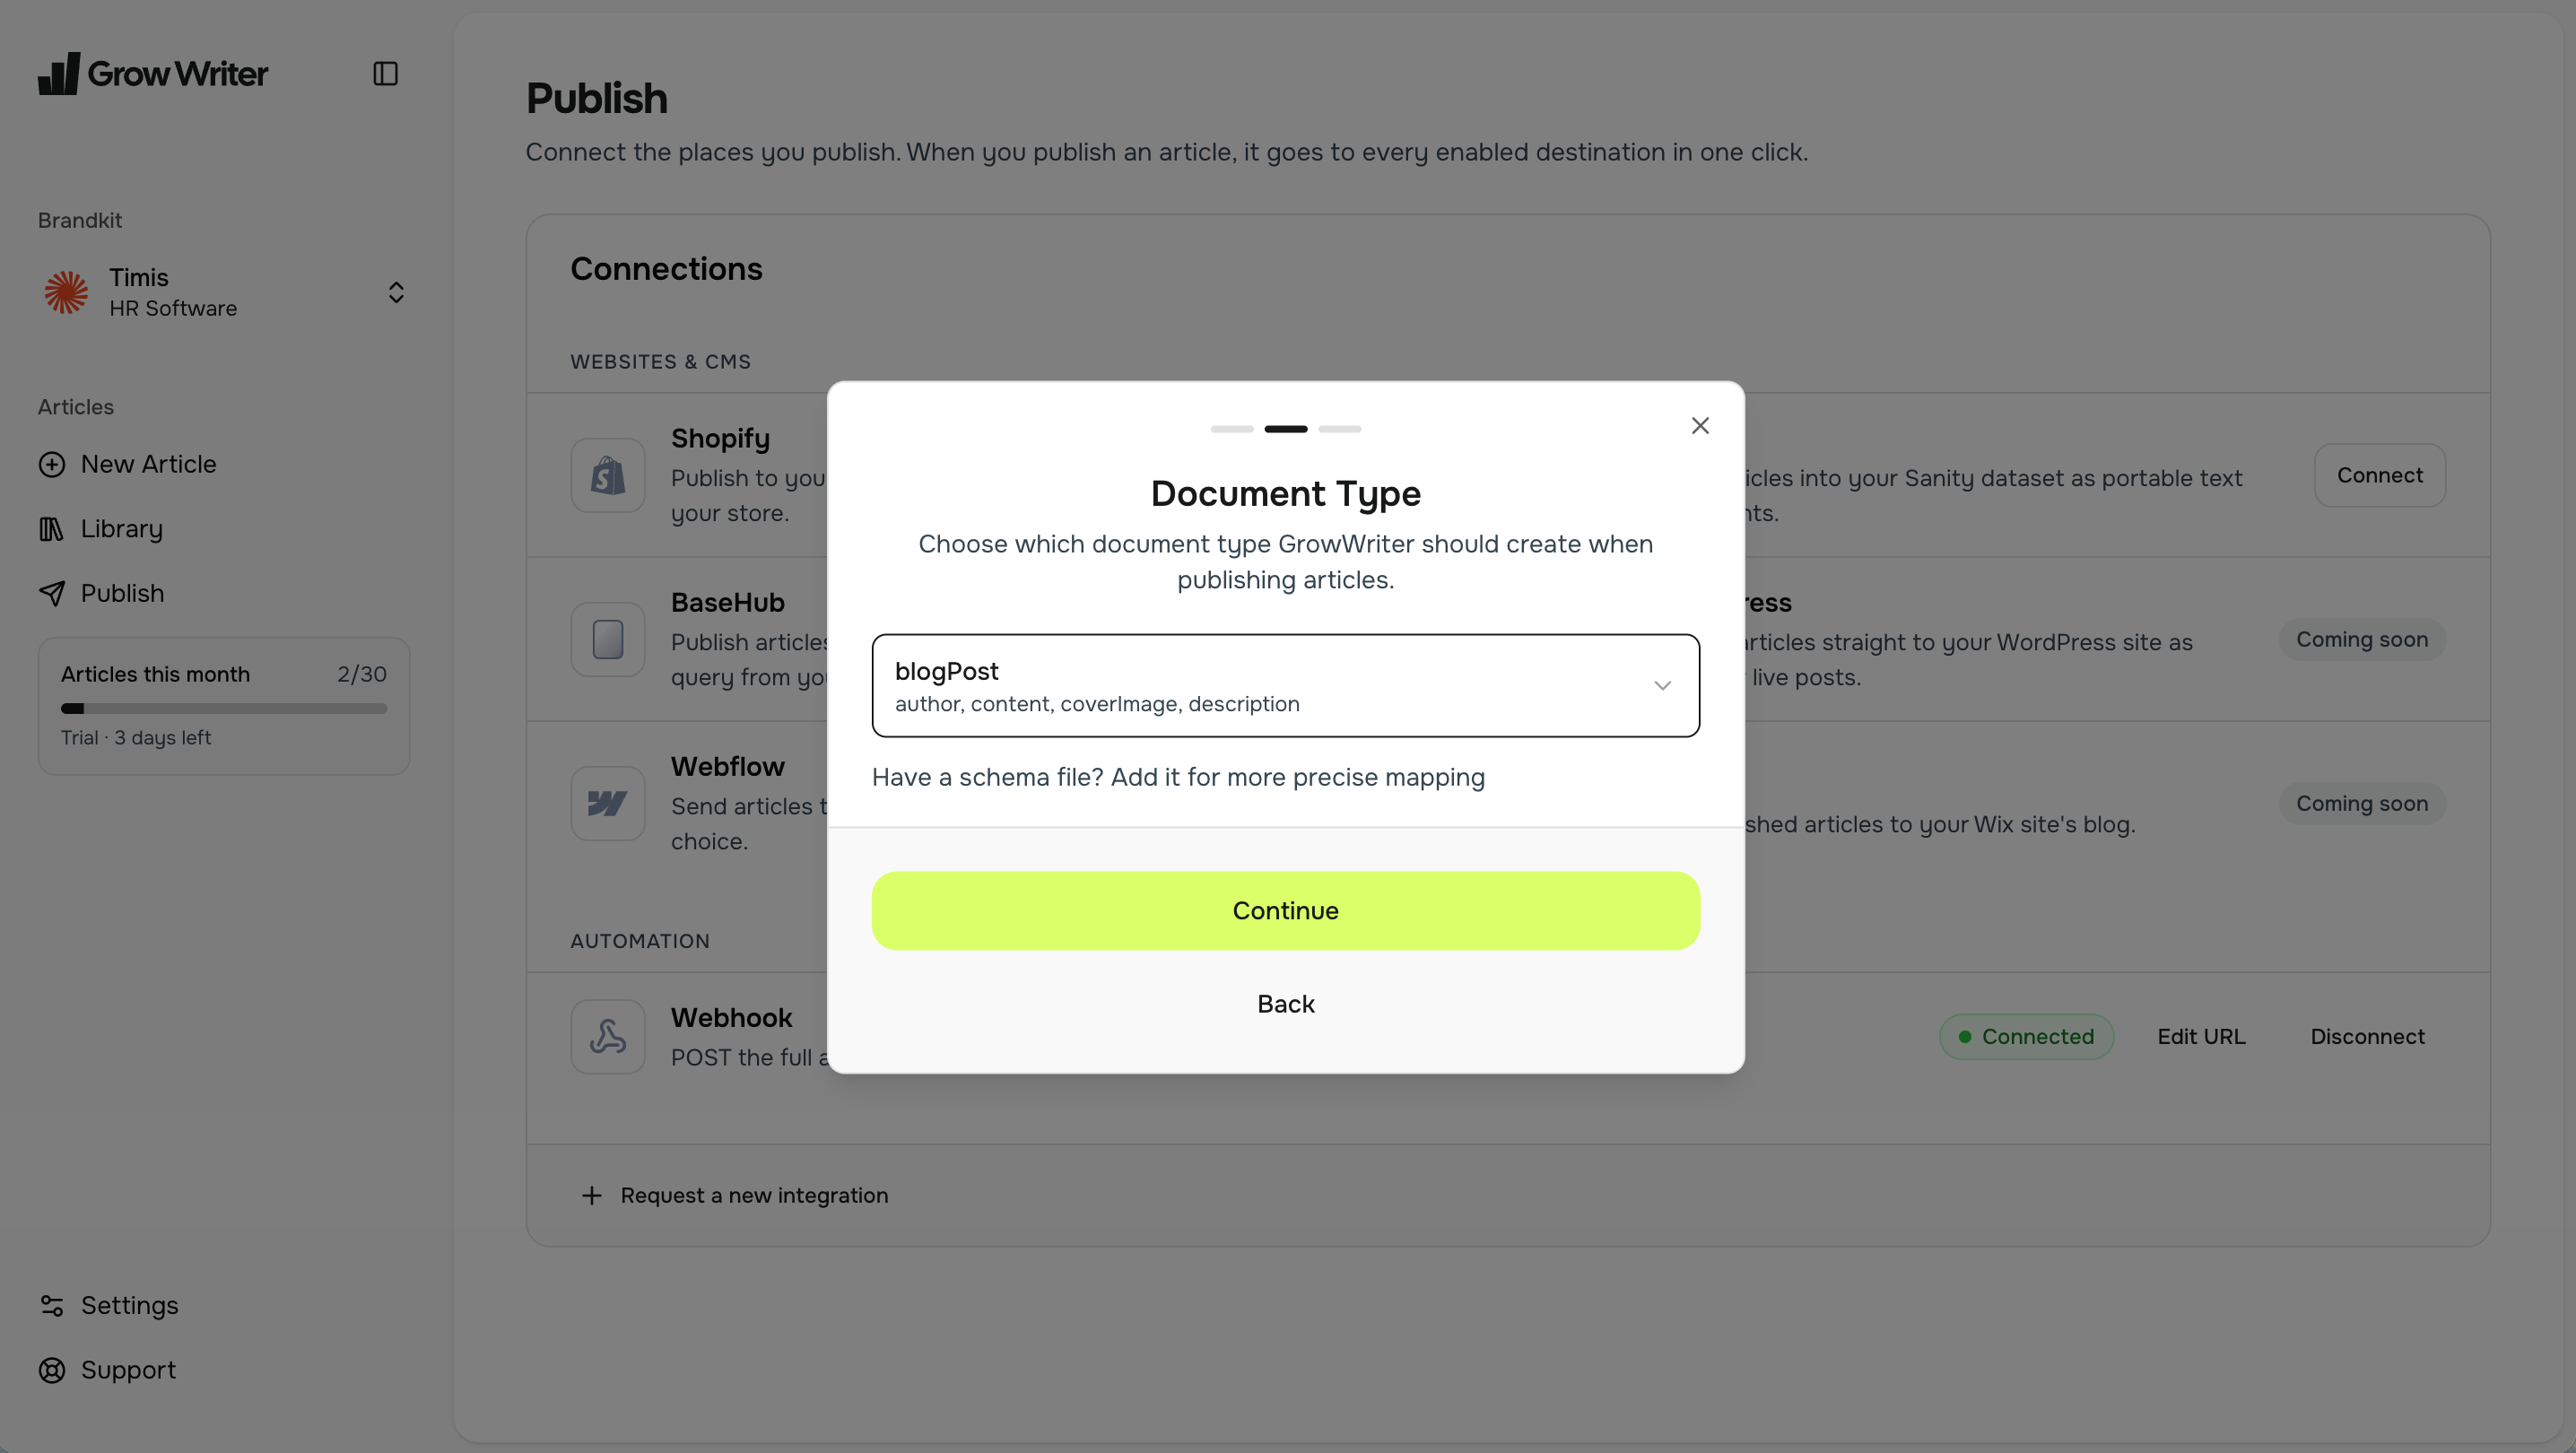
Step 2 lists the document types in your dataset. Choose the one your site
uses for posts, often post or article, and click Continue.
If the list says No content to learn from, your dataset has no documents
of that type yet. Your developer can run
npx sanity schema extract --enforce-required-fields in the Studio project
and give you the file; paste it into Schema JSON and GrowWriter reads the
structure from it instead. The flag marks which fields your schema requires,
so the mapping step can warn you when one of them would stay empty. Pasting
the schema is worth doing even when the list works, for the same reason.
Map the fields
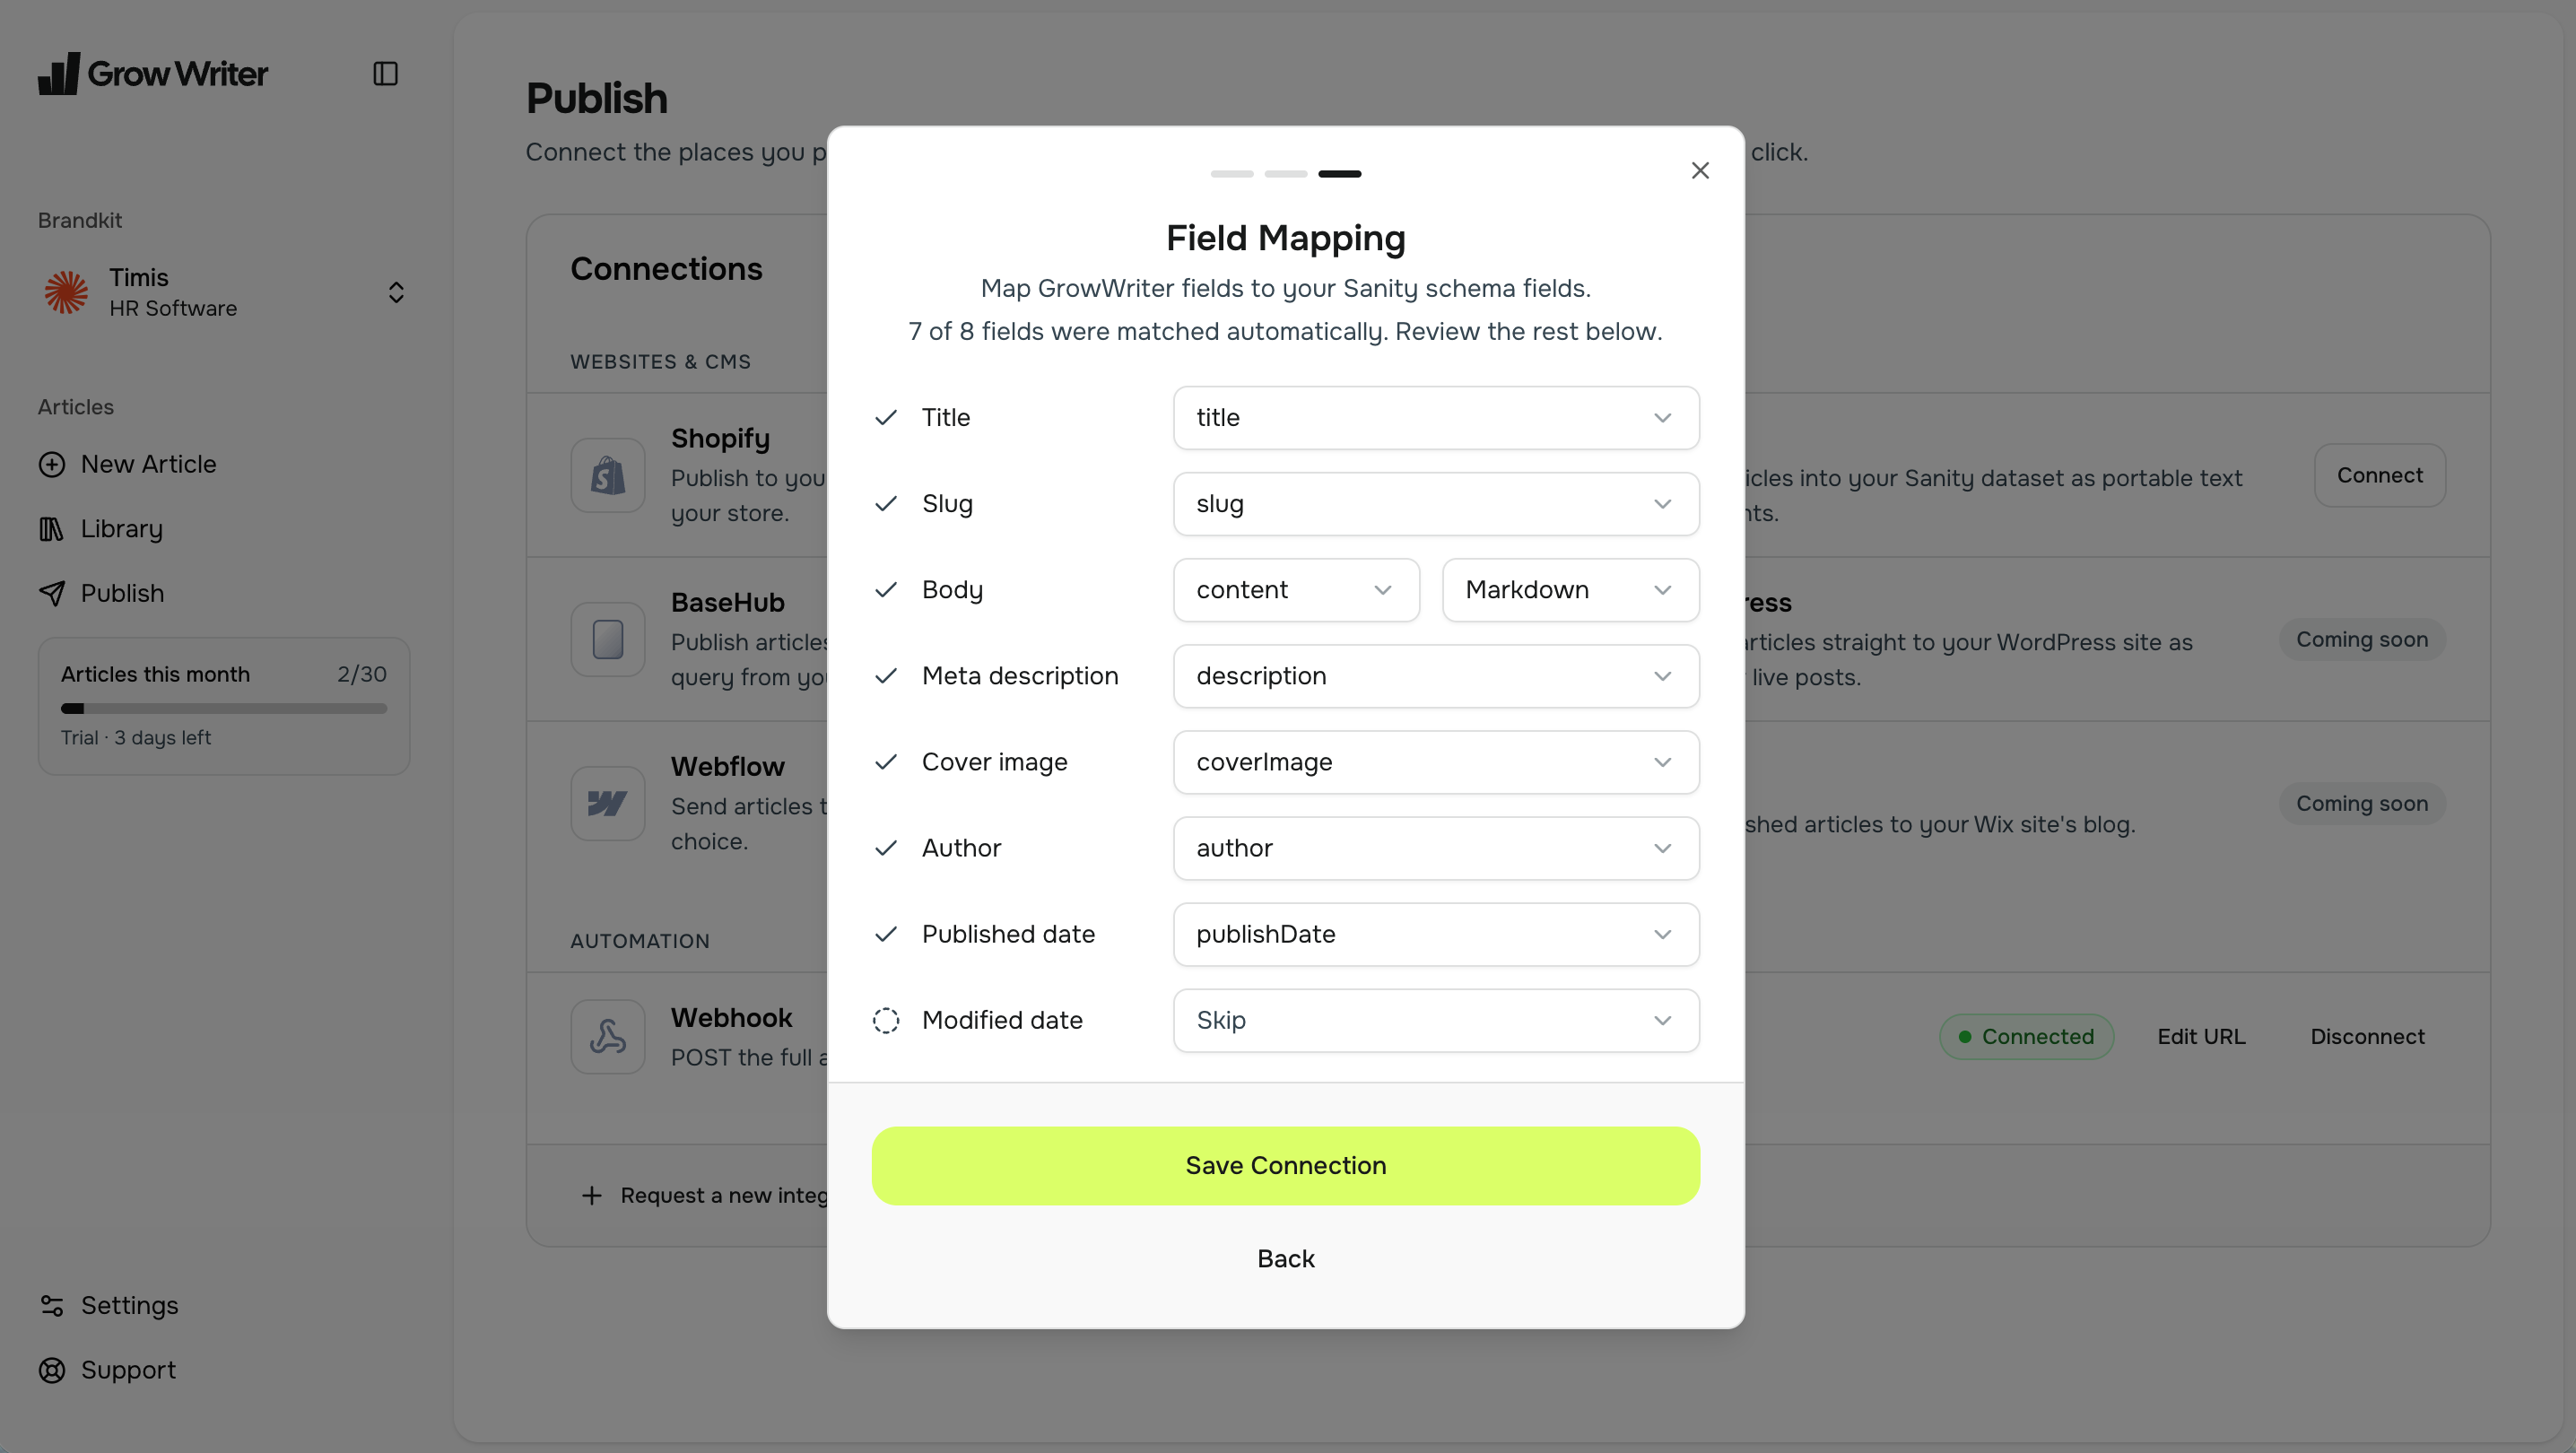
Step 3 pairs each GrowWriter field with a field in your document type: title, slug, body, meta description, cover image, published date, modified date, author and language. GrowWriter matches what it can by name and tells you how many it found; set the rest from the dropdowns or choose Skip.
For the body, pick the format your schema expects under Body format: Portable Text for Sanity's rich text, or Markdown and HTML for plain string fields. If your schema has an author reference, map it and you will pick the author each time you publish.
If your schema has a language field, map it. Many Studios and sites
filter posts by language, and Sanity accepts documents without it, so a
published article with no language can look missing even though it exists.
GrowWriter writes each article's language and adapts the code to the values
your schema allows, for example es becomes es-ES when that is what the
field lists.
Below the mapped fields, Add fixed value writes the same value into a schema field on every publish. Use it for required fields GrowWriter has no data for, like a category or a section flag. When the pasted schema marks required fields, the step warns you about any that nothing fills; you can still save, but those documents may need a manual edit in the Studio.
Click Save Connection. The row on the Channels page reads Connected.
Publish your first article
Open your Library, pick a finished article and click Publish. Tick Sanity, choose an author if your mapping has one, and click Publish. GrowWriter creates the document, uploads the cover image to your dataset and fills every mapped field.
Publishing again later updates the same document in place and keeps any unmapped fields your team edited in the Studio. The full flow, with screenshots, is on Choose where to publish.
Troubleshooting
- Sanity rejected the credentials: the token expired, was deleted, or has read-only permissions. Create a new Editor token, Disconnect and connect again.
- Sanity rejected the update: a mapped field does not accept the value, most often a date-only field receiving a full timestamp. Reconnect and adjust the mapping.
- The article published but does not appear in the Studio or on the site: a required or filtered field is empty on the document, usually the language. Sanity accepts documents that skip Studio validation, so the publish succeeds and the document exists; your Studio lists and site queries just never select it. Open the document through View post, fill the field, then map it (or add a fixed value) in the connection so the next publish fills it automatically.
- The previous document was deleted remotely, so a new one was created: informational. Someone removed the document in the Studio; GrowWriter made a fresh one.
- Published with warnings: the article is live, but something non-blocking happened, like a skipped image or a language value your schema does not list. The note under the row says what to check.
- The selected author no longer exists in the CMS: pick another author in the publish dialog.